Category: Blog

Home / Category: Blog

10 Useful Furniture Photography Tips For Beginners

September 1, 2021 | Blog | No Comments

furniture photography tips

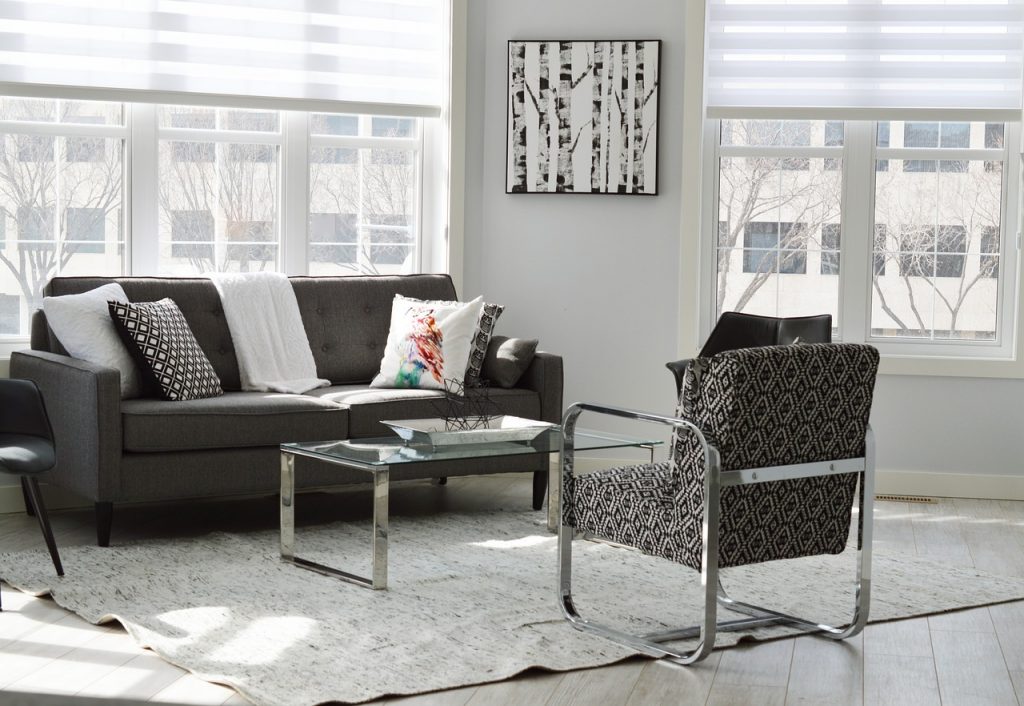
To make any piece of furniture look excellent and boost its chances of being sold, you must first ensure that it appears wonderful in photographs. If you are trying to sell your old furniture or even if you are a photographer who wants to break out into this new field, you will need to polish the angles, lighting, and composition of your photographs. Furniture photography tips for beginners.

The type of photographs you take must be tailored to the type of product you are photographing and vice versa. Because ecommerce is primarily dependent on visuals, the image you shoot can make or break a transaction. Despite the fact that photographing furniture appears to be straightforward, there are several variables to consider. In order to assist you in taking photographs that will make any piece of furniture appear like a fantastic addition to a buyer, we have put up a list of tips:

Furniture Photography Tips

Furniture Photography Tips

Tip – 1 Pick the right time

Lighting is everything in photography. You have a great source of light, the colors will look great, pictures will be sharp, and furniture details will be visible to the buyer. If you pick the right time to shoot, half the battle is already won. If you are someone who is looking to sell their furniture to avoid waste, you would not even need over-the-top photography equipment just by taking the pictures at a time when there’s plenty of light.

Tip – 2 Natural light over artificial

You will always get the best quality pictures with natural light. This is why you should try to pick a spot for photography that has plenty of natural light. In the case of furniture photography, your best option can be next to a big window so that your subject is well lit. While keeping in mind the importance of good lighting, you also have to know that too much lighting can also reduce the quality of pictures. Maintaining a balance is essential.

Tip – 3 Tidy it up

Whichever piece of furniture you are photographing, you have to make sure it looks its best already. It should be clean, free of scratches, chipped paint, etc. Consider wiping the furniture before you start shooting, taking time to fix any minor issues and make it look its best for the picture.

Tip – 4 Simple composition for the win

Pay attention to your framing and composition. The important question to ask yourself is if the picture looks too cluttered and if the furniture is the Centre of attention. If not, you can take a few things out of the frame and readjust a few elements to make sure you’re happy with the composition.

Tip – 5 Take multiple shots

Even if you are satisfied with the first few shots, you should consider taking a couple of pictures more to ensure that you have enough options to choose from later on. It is always better to end up with way too many images than to have not enough pictures. If you get a chance, try taking photos of the same thing from different angles, in other house locations, with a few adjustments in the framing and composition, etc.

Tip – 6 Use a tripod

tripod

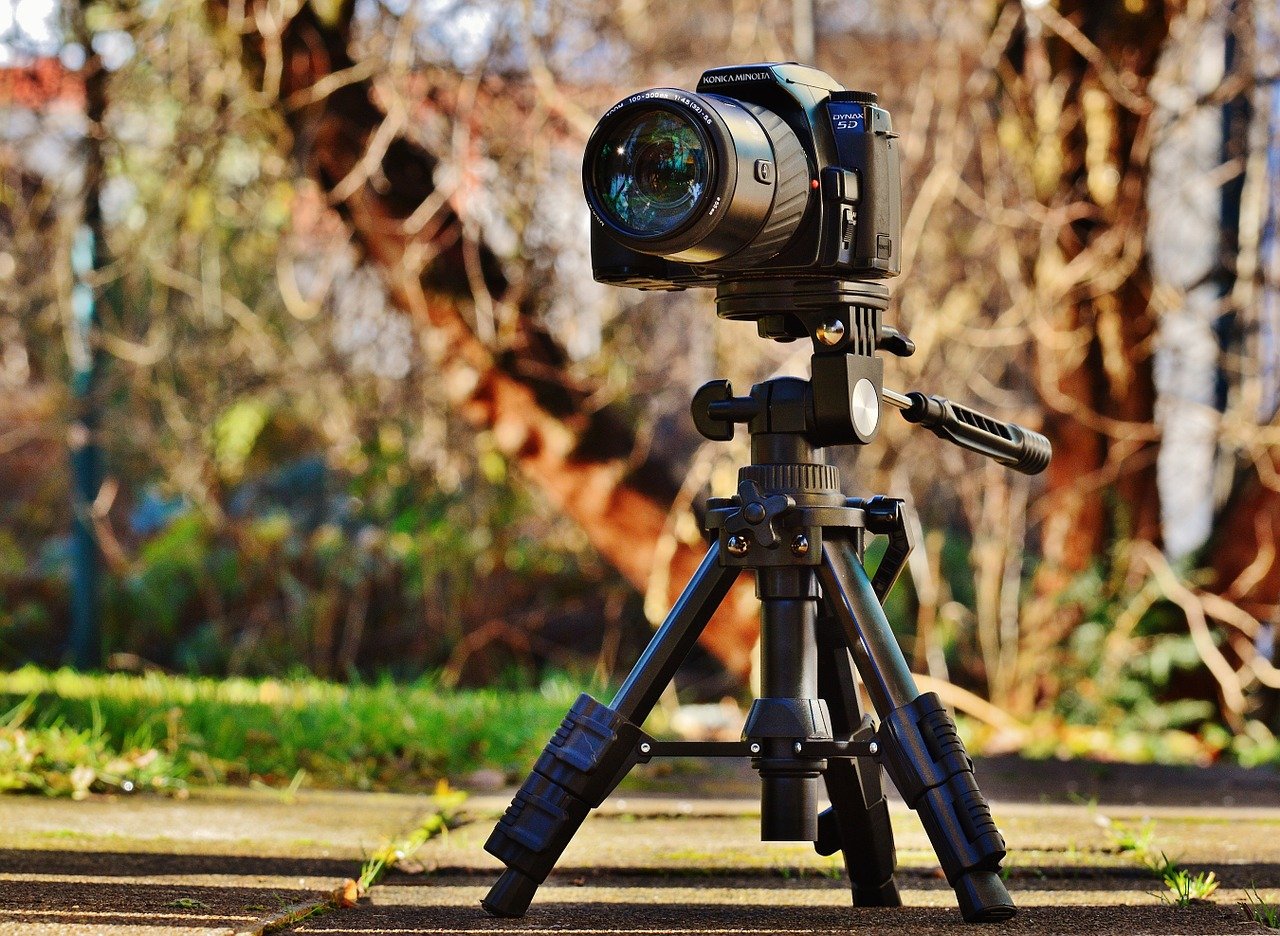
To get the most stable pictures of your subjects, consider using a tripod. This will help make sure that your photos are not disturbed by unnecessary movements or a shaky grip. Even if you are shooting with your smartphone, consider getting a tripod for more stable and crisp pictures. This way, you can take stable pictures even from compromised angles.

Tip – 7 Choose the right equipment

If you are using a camera, you should look into what lenses you have available and which ones will be optimal for taking pictures of furniture. Mainly for this kind of photography, you should strictly avoid a wide-angle lens and macro lens. The most optimal choice for photographing furniture would be a zoom lens (24mm – 70mm). It will give you enough scope to be able to photograph your furniture with comfort.

Tip – 8 Keep it simple

Keep your pictures simple so that the piece of furniture can speak and be the center of attention. It might sound fun to style the furniture the way you want and photograph it, but many times too much styling can be counterproductive. A good trick for this is to ask yourself, “will the picture look good without it?” when you add something extra. It will help you realize what’s necessary and what isn’t.

Tip – 9 Edit

Shooting is only half of the job; the other half is completed during the editing process. When people hear the word editing, they immediately think of drastic alterations to a photograph that result in a photograph that is completely different from the one that was originally captured. In reality, however, this is not the case because editing is a skill that goes hand in hand with shooting. By altering the brightness, adjusting the exposure, and correcting the colors in your photographs, editing can help you polish and enhance the images you take. It is also the moment at which you can let your personal flair to shine through in the photograph.

Tip – 10 Click, edit, repeat

Your photography skills will improve as you gain more experience taking pictures and editing your photographs. You can read all you want about photography and watch films with demonstrations, but none of it will be useful unless you get your hands filthy and start shooting. With practice, you will become familiar with your equipment and how to use it to its full potential to capture the perfect shot. Taking images on a regular basis will also assist you in determining the ideal angles for furniture, the greatest composition, your personal style, and so on.

Conclusion

Here are some Furniture photography tips. To make any advice work, you must follow them exactly each time you take a picture. The habit of shooting without regard for this rule develops over time, therefore it’s important to start with awareness. So, grab your camera, an old piece of furniture, and get to work!

How to Become a Freelance Photographer

August 27, 2021 | Blog | No Comments

freelance photographer

Individuals who wish to work as freelance photographers do so for a variety of different reasons. It’s possible that you’re aiming to make money through photography, or that you’re simply enthusiastic about the subject matter. Whatever the reason, freelancing in photography can provide a substantial source of money provided you know where to start and how to locate the right clients. Here you know how to become a freelance photographer.

Whether you plan to turn your passion for photography into a side hustle or plan to build your business empire from your freelance photography business, you will have to know where to start and how to go about it. Photography is an art, there just like any other art-related subject, the first thing you will need to have a successful freelance business is a creative eye and a good understanding of the different photography techniques.

How do I start my own photography business?

For starters, you should understand how freelance photography differs from full-time photography in order to get started in the field. When you work as a freelance photographer, you have the flexibility to shoot at times that are convenient for you, and you must go to locations that you consider safe and pleasant to visit.

Freelance photography requires a lot of time and dedication from you at the start. However, once you establish your name in the freelance photography community, it becomes easier for you to find and take up flexible jobs at places and times you can take on.

Here are a few tips for you to get started with your freelance photography business:

TIP 1 – Choose the right equipment:

Investing in high-quality photographic equipment is just as vital as learning proper photography techniques. A decent piece of equipment instils confidence in your abilities, and you can anticipate a successful conclusion. If you are unsure about whether or not you are prepared to invest a lot of money on your equipment, you might start with refurbished tools to test the waters. Many merchants will sell these refurbished tools to you at a little discounted price if you buy them in bulk.

If you have creative ideas but do not yet have the financial means to purchase a camera, you can begin playing with the camera on your smartphone. Despite the fact that phone cameras may not have the same range as a traditional camera, you can still use them to expand your portfolio. Other pieces of equipment that you may require include a tripod, telefocus lens, a second lens, and a professional printer if you plan on printing your clients’ images on the same day that they take them.

Tip 2 – Set up your website:

For those of you who are moving into the commercial sector and intend to sell your photographic services, you will require a website. The images you capture may be displayed on your website, as well as daily blogs in which you discuss your freelance photography adventure. Consider devoting some time to creating your official website, which will serve as both your portfolio and the major platform via which potential clients may find you. You might include tips on how to become a freelance photographer in your regular blogging.

Tip 3 – Build your portfolio:

If you want to make it big in the freelance photography profession, you’ll need a portfolio. Start photographing your specialization; you may also take free photographs of your friends and family to use as a portfolio. Display this portfolio on your website so that your audience can quickly find it.

Tip 4 -Pricing:

Set your prices in line with your abilities, the cost of your equipment, and so on. You might charge an hourly rate or price it according on the projects. The number of images that need to be shot, material, props, travel costs, editing time, and depending on the client’s requirements are just a few of the important factors to consider when pricing your packages. Pricing your photography packages correctly is critical if you want to make a livelihood from it.

Tip 5- Choosing the niche:

You can be an expert at taking any type of photo, but to build a name for yourself in the industry, you’ll need to specialize in one or two areas. If you’re not sure which niches are right for you, try clicking on photographs of each one – nature, model, wedding, child, vacation, etc. Choose no more than two to show that you are serious about your company.

Do you need a license to be a freelance photographer?

If you are in the beginning phases of your freelance photography business, you do not require a business license. However, if you have a team and your firm continues to develop year after year, you may be required to apply for a business license. To operate a freelance photography business in some towns or states, you may also be required to obtain a permit from the appropriate authority.

How much does a freelance photographer make in a month?

The income of a freelance photographer depends on various factors like the type of client you choose, the quality of equipment you use, your experience in the industry, etc. Since it’s a freelance business, you can charge it whatever you want.

ecommerce image optimization tricks

Whether you have a business website where you sell your products or have a personal branding website, one of the easiest and best ways to attract more visitors is using images. People like consuming information from articles/blogs with images rather than only plain text. Infographics also make it easier to connect with complex information and understand without trouble.

To include an image on your website, you should familiarize yourself with the term image optimization. The inclusion of images might increase your web traffic, as people find it entertaining and easy to go through the pages. However, if your images are not correctly optimized, the plan for your website to reach more people might backfire. 

How to Optimize Images for Ecommerce Websites?

Are you wondering how to do image optimization on your website? You can do eCommerce image optimization in various ways. You can either fix your image size, dimension, format or do all of it. Image optimization, when done correctly, is undoubtedly one of the fastest ways to boost your web traffic, thus increasing revenue.

ECommerce image optimization mainly includes resizing the image or compressing the size. It would help if you also remember that the optimization should not sacrifice the product image’s high quality or slow down your site. 

Do you know that more than 25% of Google searches are Google Image Searches? So, when you optimize your eCommerce images, there is a chance that it might be producing click-throughs to your eCommerce store. 

Why SEO experts give importance to eCommerce image optimization?

Images of a product stitched to a product description appeal to the visitor and give them an idea of what it would look like. 

eCommerce image optimization

Image optimization is essential because:

1. Increases loading speed:

When you optimize an image to the search engine standards, it will make your web page load faster. Did you know that most people would click out of your website if it takes longer than 2-3 seconds to load? So, an optimized image eliminates the possibility of people clicking out of your website due to slow loading time. When an image is optimized to correct dimensions, size, resolution, it will not slow down your website as an un-optimized image would do. It gives your users a faster experience and retains customers.

2. Improves SEO ranking:

Image optimization helps your website rank higher in search engine results. Ranking higher means more people will visit your website and become a long-time customer.

3. Improves user experience:

More than 50% of internet users like to visit websites via their mobile devices. So, you should keep in mind that while you optimize your image, people should access it from desktop, mobile, tablet devices just as quickly. A fast-loading time will bring in more traffic and higher conversions when people can access your images from all the devices.

So, these were some of the main reasons why image optimization is necessary for your eCommerce website. It not only makes your website more appealing to look at but also helps you grow your business.

What are some image optimization tricks that will bring in more sales?

image optimization tricks

Now that you know how eCommerce image optimization is helpful for your business in the long run, you should not wait around to make the necessary changes to your website. If you are wondering how to do image optimization and if there are any tricks you could apply, here are ten of them for your convenience:

1. High-quality images:

Choose the best high-quality pictures you have of your products. If you have low-quality images, optimizing them would only make your pictures blurry. Websites with high-quality images also receive more click-through with higher conversion rates.

2. Use the correct file type:

You can choose images in their various formats. The most popularly used image formats in eCommerce websites are JPG/JPEG, PNG, TIFF, and GIF. Choose whichever has the best quality so that you do not have to compromise its quality when uploading to the website.

3. Text in your product images:

Google is a search engine that can read texts, not images. So, including creative and detailed text in your product images is a good idea to drive more sales. Use relevant keywords to keep your image SEO on top of the game.

4. Copyright:

When you are running an eCommerce website, always use images that belong to you or you have clicked. Using copyrighted images only declines your web traffic, and it could become a huge legal issue if someone sues you for using them. Similarly, when you upload your images, make sure no one else uses them to avoid duplicity.

5. One primary keyword:

While keywords are important for SEO as a whole, make sure to use only one primary keyword with each image. Keyword stuffing in image optimization could cause more harm than good.

6. Name your images:

Instead of using images with some random numbers and alphabets, make sure to name them correctly. Naming your images is one of the most vital steps of image optimization. Choose at least one keyword or a slight variation in dropping the image file name.

7.Image angles and dimensions:

Including pictures of your product from different angles is now a common practice. However, when you do that, ensure that you are choosing the angles wisely and all the dimensions are the same so that none of the pictures looks bigger or smaller than the other.

8. Include alt attributes:

Alt attributes, or alt tags, helps you include information about an image. When the images load slower, an alt tag provides information on the content of the image. Alt attributes are essential for Google to rank your image and your eCommerce website.

9. Page load time:

Including images can sometimes slow down your web page. So do not forget to keep an eye on the page loading time. To ensure that your page does not slow down, you can compress your images or resize them. You can use various free tools to monitor your web page speed.

10. Optimize your thumbnails:

Thumbnails give visitors an idea about the different categories. While it can be a helpful tool, if the thumbnail images are not optimized to standard, it could affect your website speed again. Your thumbnails should be as small as possible to keep your website fast. While using alt attributes in the thumbnail, make it as different as possible to avoid being indexed.

With these image optimization tips readily available; you can make the best out of your eCommerce website and grow your business.  ECommerce image optimization could be of great help for you in expanding your business when you know to do it correctly.

For ecommerce photo editing services you can reach out Shootpro24 as they are the best service providers in the photo editing and video editing business.

photography ideas

Have you ever wished you knew how to take photographs that are both stunning and professional in appearance? Every professional-looking photograph is the result of years of expertise, extensive experience, and high-end photography equipment. However, you do not have to go that far in order to capture your own amazing photographs. Check out here for creative photography hacks.

Instead, you need to turn on your creative mode, and your basic photography gears will turn out to be as apt as any high-end equipment would be. 

Here are 10 creative photography tips and hacks that will surprise you with the results. 

1. Fake Bokeh with a tin foil

Creating bokeh photographs is certainly about having a fast camera, skills, and few camera settings. But if you are not a professional photographer, you can use tin foil to create a bokeh background. 

fake Bokeh with a tin foil

Crumble the tin foil, and use it as a background for your subject. You can experiment with the results by changing or moving the light over the tin foil. 

2. Underwater photo using a fish tank

Underwater photography is often backed by an expensive budget. Usually, this type of photography involves scuba-diving and a waterproof digital camera. But if you don’t own one or underwater photography is not a practice you often do, you can use a fish tank for shots.

Underwater photo using a fish tank

You can put the camera on the tank to avoid it from getting wet. Also, remember that the regular camera settings will not work. Try to avoid the flash. 

3. Soft focus with a Pantyhose

Soft focus is a popular aesthetic in modern times, and early Hollywood films used this concept of photography for female actresses. While the soft-focus effect uses the imperfection of lens optics, you can use a pantyhose to create a near-perfect soft-focus shot.

Soft focus with a Pantyhose

Use the pantyhose over your lens, and fix it using rubber bands. But remember that different colors of pantyhose will bring different results.

4. Instant bokeh with your laptop

bokeh with laptop

This might not be the most realistic looking photograph, but you can still try out your skills and creativity for fun. Open a bokeh image on your laptop, and use it as background. You might want to place a flat surface over the keyboard if you are planning to click the full length of the object. 

5. Overhead shot with DIY holder.

photography hacks

Overhead shots will require many pieces of equipment, but you can make your own top-down camera holder. Use cardboard to fold in a little shelf, ensuring it makes a semi-square shape with wings on both sides. You hold the wings with cello tapes to hold to the ceiling and put your mobile on the shelf with the desired timer. 

6. Rainy day photography with a spray

Rainy day photography with a spray

If you want fresh looking rainy day photos but are not sure whether it will rain any day soon, you can always create fake rain. You can create a shot through a window where raindrops are resting. This type of photography often uses a glass surface with raindrops, and the subject is behind the glass surface. You can use spray water on the glass surface for effect.

7. Cucoloris photography

If you want some economic cucoloris photography effects, you can use cardboard and a knife to cut them into different shapes. If you want to create a window shadow backdrop, you will need to cut your cardboard with a window shape. Position this shape in front of the camera lighting, and let it cast shadows on the subject.

8. Photo filters with transparent colored films

Surely, you can edit your photos after being clicked with an unlimited number of filters, but there’s nothing like using filters to click your photos. You can use different colored plastic bags or transparent films to place them in front of the lens to get colored filters.

You can always experiment with two different colors at the same time on both sides.

9. Photo filter with sunglasses

One of the great and convenient ways to add filters to your photos is to use your sunglasses. Sunglasses always have a surface that changes the color of the scene.

No matter what camera you have, either professional or mobile, you can use sunglasses in front as you click a picture. 

10. Add lens flare with a torch.

Including a lens flare in your photograph enhances the realistic appearance of the image. When taking photographs outside, it is common to see a lens flare appear in your photographs as the sunsets. Using a torchlight to create artificial light can help you achieve a lens flare indoors if you are trying to photograph in low light.

Natural lens flare requires the manipulation of the subject; whereas an artificial light source is more convenient because it allows for the manipulation of the light source (and thus the subject).

Conclusion: 

Let’s see which of these photography hacks seems doable for you. Do let us know if you want more creative ideas for photography like them. 

Top 15 Photography Trends in 2021

July 28, 2021 | Blog | No Comments

photography trends

2020 was an overwhelming year and heavily influences 2021 photography trends. The lockdown has forced people to lead an isolated life, affecting photography in various forms.

As the worldwide pandemic continues to affect daily lives in various countries, take a look at these 15 photography trends that might spark up your life. 

1. Social distancing

The worldwide pandemic will remain in history forever, but why not create happy memories while maintaining social distance and wearing masks? Now that this is our new normal and reality, it is better to show up in photos and memories this way. It will also inspire and remind other people to follow the precautions till all get well again. 

2. Solo adventure

adventure photography

People who are not actively working during the pandemic have found some time to spend on travelling. Some places are still open for travel under restrictions. If you are following precautions and travelling alone, click some great pictures to give a glimpse to those who are stuck at home. 

3. Environment photography

The lockdown has seemed to affect the environment positively. As many factories, the aviation industry and cars have taken a back seat, the pollution level has dropped too. While taking photographs of the healing nature is a new trend, climate change photography to bring awareness is still the top priority.

4. Activism Photography

The pandemic has been brutal on many people, including street sellers and small vendors. It is important to bring their stories to digital platforms. Apart from that, 2020 has also encountered many other issues like racism, hate crimes, discrimination, religious matters, etc., that have taken place in photography trends.

5. Intimate wedding

pandemic wedding

Pandemic weddings are a fad on their own. While many people still went with ‘big fat weddings’, most other responsible ones chose to keep it simple and within the family and close friends. These turned out to be relaxed weddings, and we have come across many beautiful photos where precautions and rituals met beautifully.

6.Family and activities

While few people were forced by lockdown and travel restriction laws to not be together with their families, most others are enjoying quality family time together. Parents in 2020 and 2021 are enjoying their WFH life, where they get to play and do activities with their children and supervise their studies. 

7. Workout photography

workout photography

Because gyms were closed, people experiencing less physical activities have led them to start working out at home. And who doesn’t like to show off their healthy body that is staying fit even during lazy times?

8. Drone photography

Drones are now less expensive and more efficient. Drone photography has become more popular in the last few years, and especially in the previous year. Aerial photography is more manageable with drones, but of course, you cannot fly it anywhere you wish.

9. Food photography

Back when lockdown started, people started practicing their cooking skills. The food and cooking photography trend will still be popular in 2021 because we are pretty sure that many people learned cooking during the lockdown.

10. Art photography

Keeping up with the latest COVID-19 updates is not possible at all times, and we don’t recommend it at all. But if you are looking for an escape, you can start spending time with hobbies and art and inspire others to do the same. Share your art photos in online communities and your social media. We are sure people will love it.

11. Outdoor photography

outdoor photography

Show your friends and online communities how your area and localities have changed in terms of traffic, pollution, gatherings, people on the roads, etc. Outdoor photography has been one of the popular trends since last year as people see the outdoors in a different light. 

12. Silhouettes

Silhouettes have been around forever but have never been a trend. But in 2021, we are seeing many closeups of a person with a focus on the background. 2021 will see many silhouettes, and if you want to jump on the bandwagon, start looking for some unique ideas. 

13. Workstation

We have come across funny photos of workstations of people working from home. Either they are a standard and thoroughly professional set-up, or just some random books and a small table used to elevate a PC. WFH workstation photos are interesting to the online community. 

Note: Poor ergonomics can create physical health issues. 

14. Self-care photography

As chaos and sad news overwhelm the world today, it is important to take time to be away from negativity and focus on self-care. Many online influencers are sharing their self-care photos and videos, urging their fans to do the same. 

15. Emotion

emotion

Not meeting friends and family as often as before is taking a toll on many people’s emotions. It is important to share your emotions and thoughts, and photography can be a convenient way to do so. 

Let us know which trend you have already joined and which will be your next.